
Burkett Solenoid leak...
- Thread starter jerrybforl
- Start date
You are using an out of date browser. It may not display this or other websites correctly.
You should upgrade or use an alternative browser.
You should upgrade or use an alternative browser.
I just read the part where the guy on the phone told you that you'd hear the buzzing if it was running. I hear my solenoid buzzing occasionally - all of them, in fact - but only occasionally. I feel like that's fairly normal, and on those occasions where I'm annoyed by it, I just unplug and replug it and I get quiet. So don't assume it's not working if it's not buzzing. Only assume it's not working if it doesn't click.
Wow ok Oldpunk...Thanks. That is what I was afraid of. I will remove and flip it around.
@ Oldpunk...Are you saying that the rubber end is backwards?
@ Oldpunk...Are you saying that the rubber end is backwards?

Ok thanks. I will change tomorrow and test it. It shouldn't be that hard. I will post a pic of it properly installed.
Yeah I'm learning a lot too Matt! I never thought about opening it up until the guys at AP.com said to.
You called it though Matt...dang teflon tape! I'll open it up tomorrow and switch it around. Thanks for all of the input guys...
You called it though Matt...dang teflon tape! I'll open it up tomorrow and switch it around. Thanks for all of the input guys...
Credit where credit is due: LeftC was the one who initially suggested the teflon tape (he said silicone tape, but meant teflon). ")
What did they say about the seal tear?
What did they say about the seal tear?
They said that it shouldn't make a big deal. It was a very small snag, and I don't think it will effect it's purpose. Remember it's the one that goes over the rod not the one that seals the casing.
I will take pics of it too, so you guys can see what I am referring to.
I will take pics of it too, so you guys can see what I am referring to.
Ok guys, so I opened the solenoid up again and took it apart. I plugged it in, and I can definitely hear the click the guy was talking about. It almost pops when I plug it in and pull it out. The guy said that is the gate shutting.
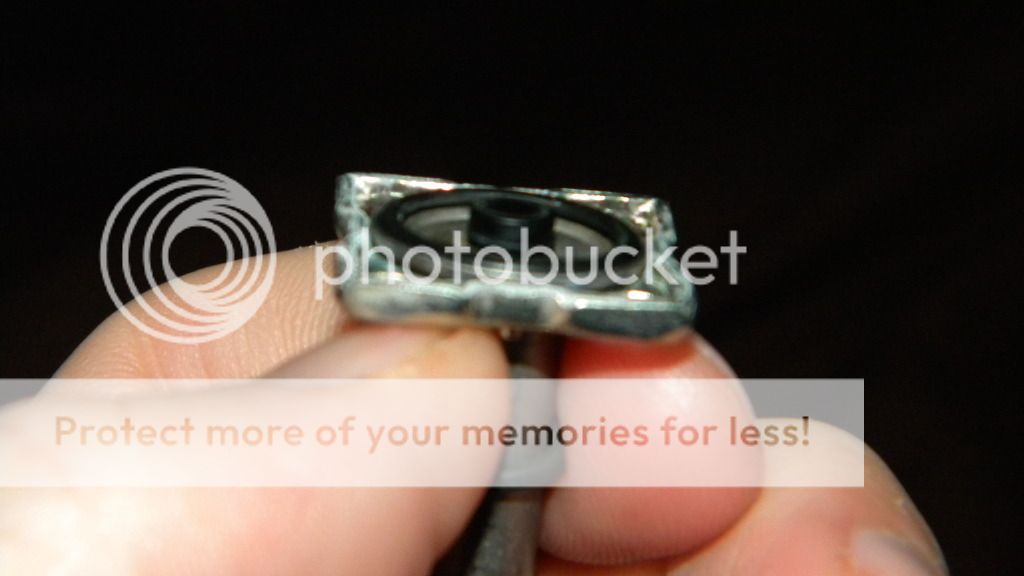
So here are some pics.
1. The small ORing on the rod. This is the one with the small snag. It wasn't bad mind you. Just a little tear that I simply pulled off. Very small.

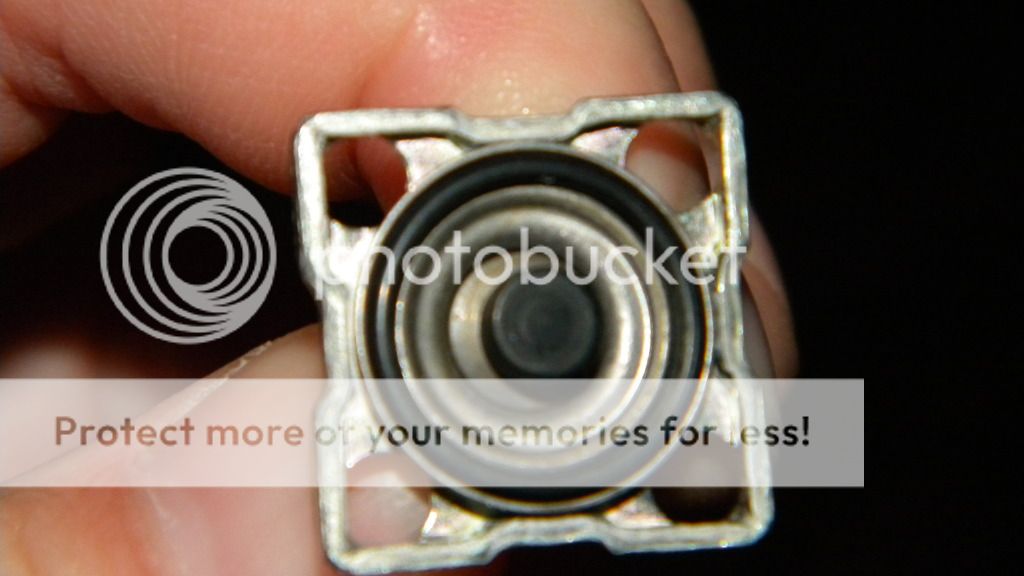
2. This is the IMPROPER way to reassemble.

3. The PROPER way to reassemble.

4. These last two are it re-installed into the rod.
Hope this gives you guys a guide line on how to take your 6011 Burkett Solenoids apart. Remember to be careful with the heads of the screws. I will test it later on a tank and make sure it is working properly.
So here are some pics.
1. The small ORing on the rod. This is the one with the small snag. It wasn't bad mind you. Just a little tear that I simply pulled off. Very small.
2. This is the IMPROPER way to reassemble.
3. The PROPER way to reassemble.
4. These last two are it re-installed into the rod.
Hope this gives you guys a guide line on how to take your 6011 Burkett Solenoids apart. Remember to be careful with the heads of the screws. I will test it later on a tank and make sure it is working properly.
Tools and installation...
Tools
1. Crescent
2. Star Head (not sure, but I believe it's an 1/8... that's what the guy from AP.com told me)
3. In this case, I had to tap the head. I used a 1/8 drill bit to tap out the head. I didn't bother with tapping into the threads. If need be, I can use a smaller bit and bore it out.
Installation
1. Remove your BC as they usually have a fluid in them. This will keep you from handling the reg in an awkward position.
2. Remove the nut from the solenoid
3. Carefully pull apart the two components
4. When unscrewing the small screws from the actually solenoid chamber, be careful not to stripe the the heads. If you strip them, you will have to tap the heads out!
A. Learning from experience, it is best to leave the other screws in while you tap out the bad head.
B. This way the internal components will not spring out at you. This was my issue, and I replaced them back in backwards. Thanks again Oldpunk...
5. The plunger, as the AP.com guys call it, faces out from the rod. ***See pics in previous post***
6. The spring goes inside the plunger, the thing with small black rubber head, with the spring going into the rod. The plunger covers the small center hole inside the solenoid.
7. Replace the screws. Be careful the ORing from inside doesn't fall out.
8. Plug it in and see if it makes the clicking noise. Do this by plugging it in and out once or twice. You will hear the click.
If you guys need to see the pics, let me know. I will edit this thread, and I will place pics in here underneath the step by step.
Matt F.;89998 said:VERY informative thread. First one I've seen like it. Thanks for making it. Sticky?
Stuck as requested
There are NO other informative threads on this site? I disagree with that,, pretty sure you even wrote one or two.....Gerryd;89999 said:Stuck as requested
LoL, I meant on the topic of breaking down a burkert solenoid. First time I've seen one a part.
I learned a lot by seeing this thread.
nice, the seal mechanism is the same as parker B series, and kind of similar to the Mac 35 series solenoid which the washer seal inside instead of oring.
Gerry I looked all over and found nothing! I'm glad that you guys were able to to get some benefit from this. I didn't get to check to make sure it worked as I am at the AGA convention. I will check when I get back.
Thanks to MattF, LeftC, and Oldpunk. They helped get me through this issue!!!
Bettatail if you could add some pics to show what you are referring to. This would show more to what I showed...
Thanks to MattF, LeftC, and Oldpunk. They helped get me through this issue!!!
Bettatail if you could add some pics to show what you are referring to. This would show more to what I showed...